

How To Set Up Lighting For Clothing Photography
How to Photograph Clothing for Your Ecommerce Store
When you lot photograph clothing for your ecommerce store, y'all certainly desire to become information technology right. It tin be the difference between closing that auction or the potential client bouncing off the page.
Clothing isn't as tricky as photographing jewelry as you're not dealing with small, shiny and detailed pieces but you still need to get your fix up right and capture all the details.
In this stride-by-step guide, I comprehend the nuts of product photography: equipment you will need, preparing your clothing items, setting up your photograph studio (even if it'south just at domicile).
Disclaimer: This post is for ecommerce merchants who are setting upwardly their first production photography studio and have some cognition of photography
Pace ane – Decide on how you lot want to display your products
Before starting anything, you need to make a decision on how you lot would similar your vesture items displayed on your ecommerce shop.
At that place are three mutual ways how merchants photo clothing:
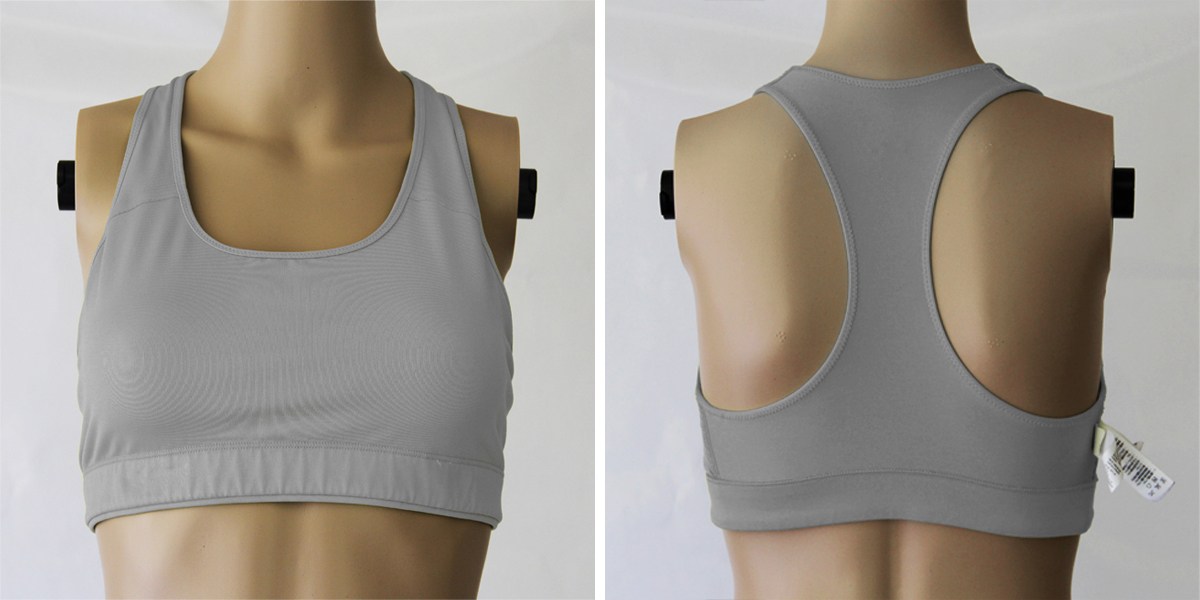
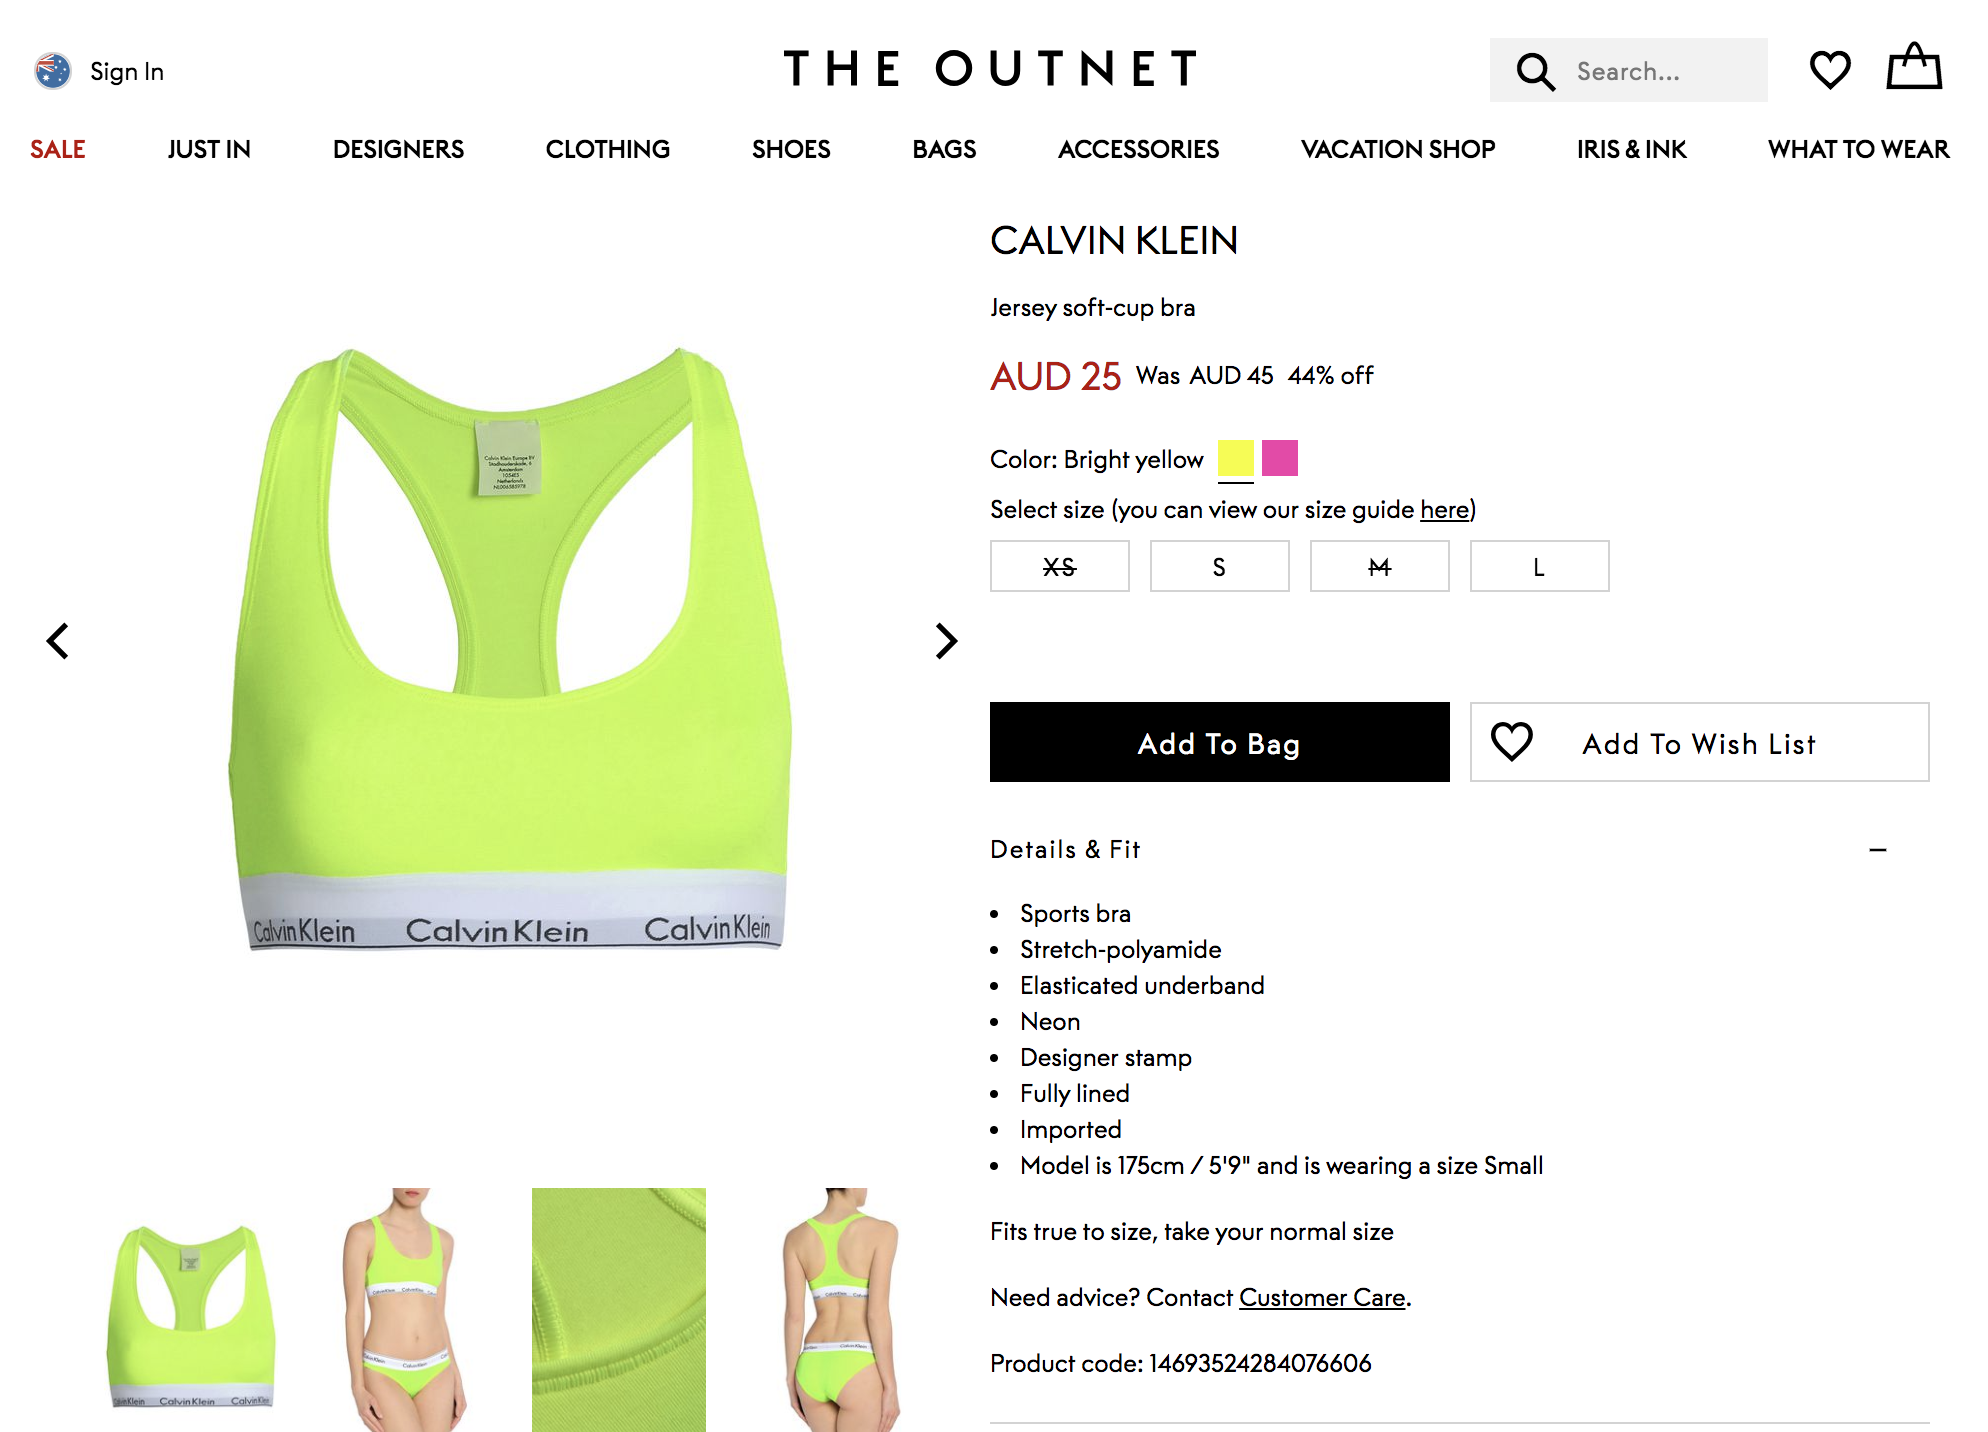
Utilize an invisible mannequin
When information technology comes to product photography, displaying a product in a more realistic course such as a mannequin tin be of great value to your customers.
Online shoppers are more than probable to purchase an particular of clothing if they can visualize how it'll look when they wearable it.
A mannequin will give your products a realistic human shape without the hassle of finding a model for each photoshoot. You tin can remove the background from each photograph afterwards for a professional person affect.
Tip: Avoid amputated arms, unless you lot're shooting something strapless. It will accept lots of time and skill to give a dangling, empty sleeve a realistic form on Photoshop , whether y'all take the groundwork removed or not.
Tip: Make sure you use a mannequin that is standing direct-on. Mannequins designed for brick-and-mortar stores are oft standing in unique poses and then that they don't all await the aforementioned when standing together.
Information technology will look actually weird when you lot remove the background from a photo and the mannequin has ane manus on its waist or its hip sticking out!
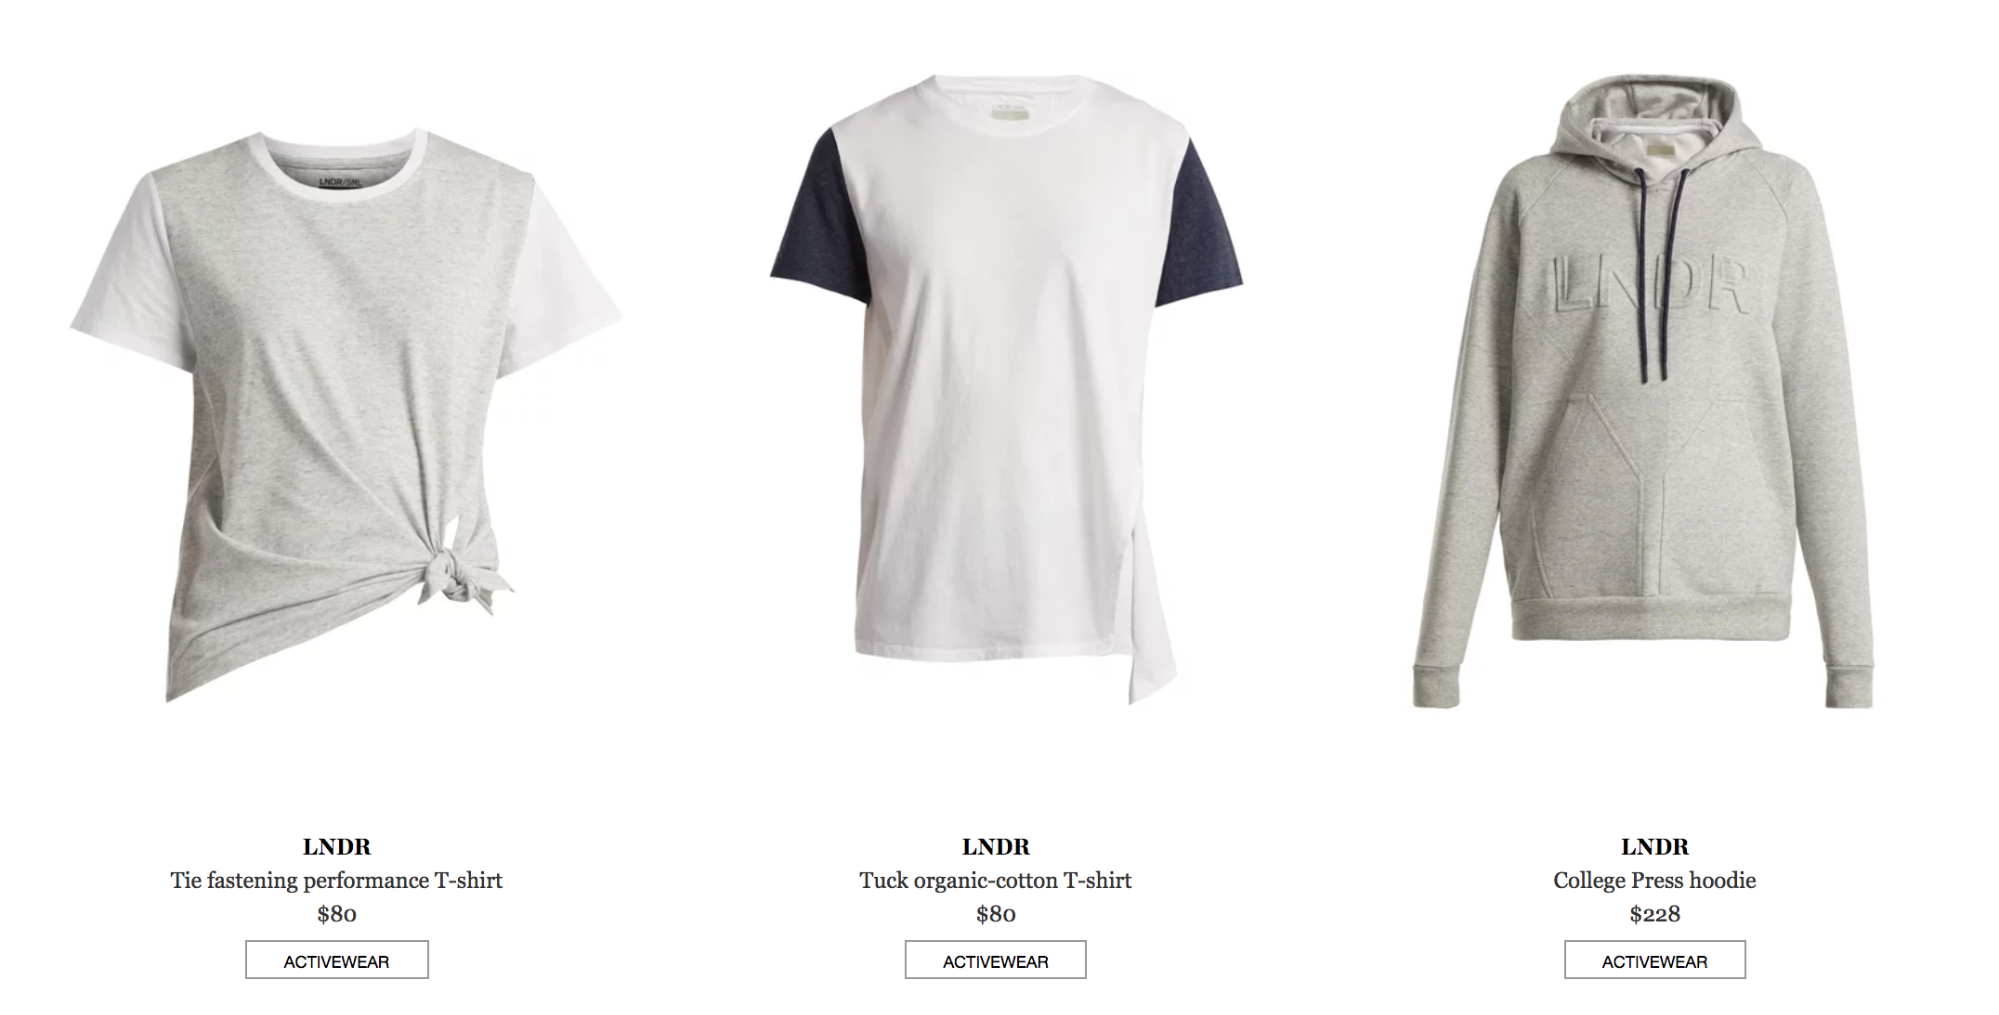
Hire a model
If you have the budget, hire a model.
Models can strike whatever kind of pose or work with whatever kind of angle that flatters your piece of vesture. This will help you create the perfect in-context s hot of your product which you tin use on your ecommerce store and also on social media… think Instagram and Pinterest!
Tip: You should experiment with different poses but brand certain you don't cover upwards too much of the product you're selling after all the buyer wants to see the details.
Models also give your products personality and create more than of a brand. A lot of online stores, for example, choose models who they think represent their 'target customer'. If y'all compare Zara and Arnhem , the models, the clothes, and the vibes couldn't be more than different.
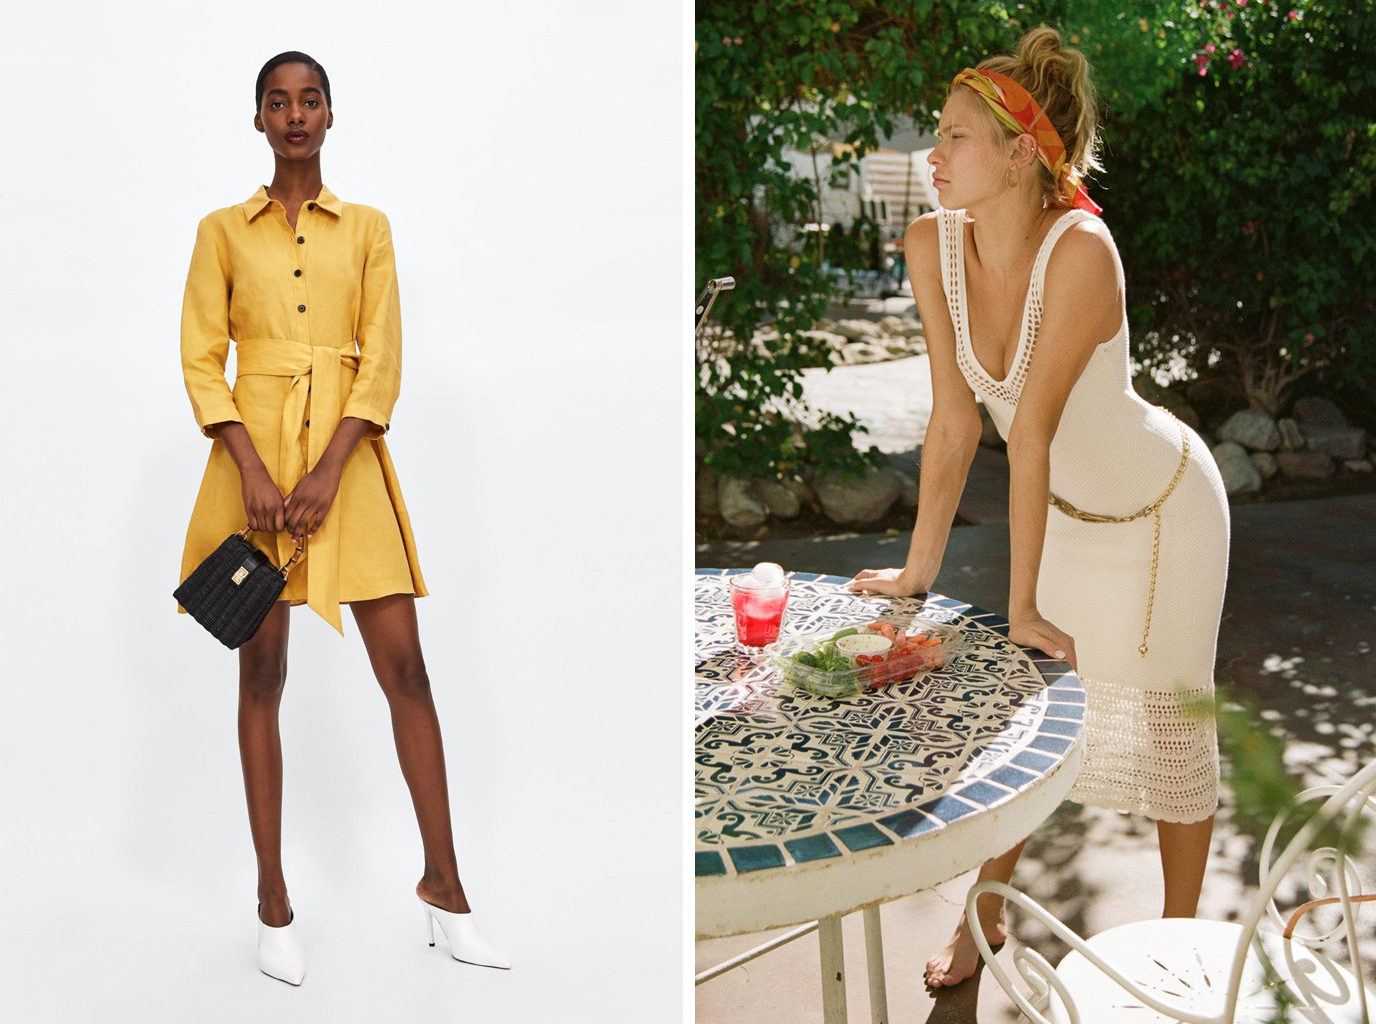
These production photos from Zara (left) and Arnhem (right) employ very dissimilar models and styled shots that convey their brand best
On the downside, models will cost you more than a mannequin and you will have to find a mutually convenient time to shoot, which isn't always easy.
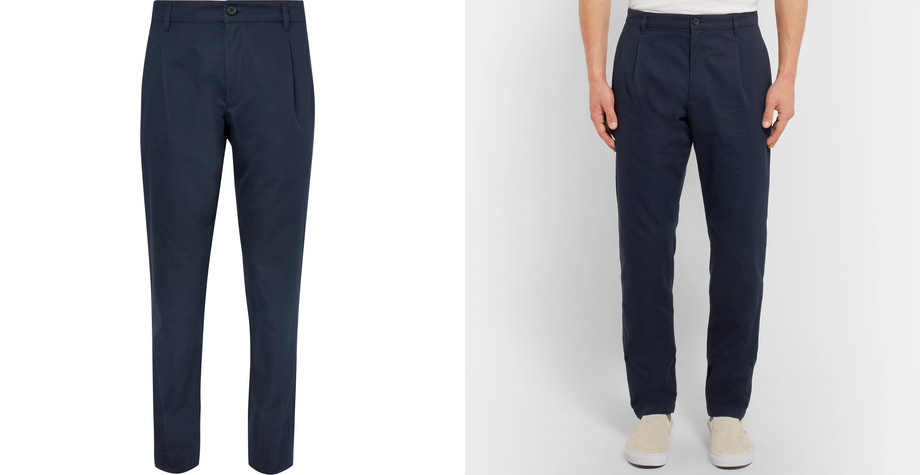
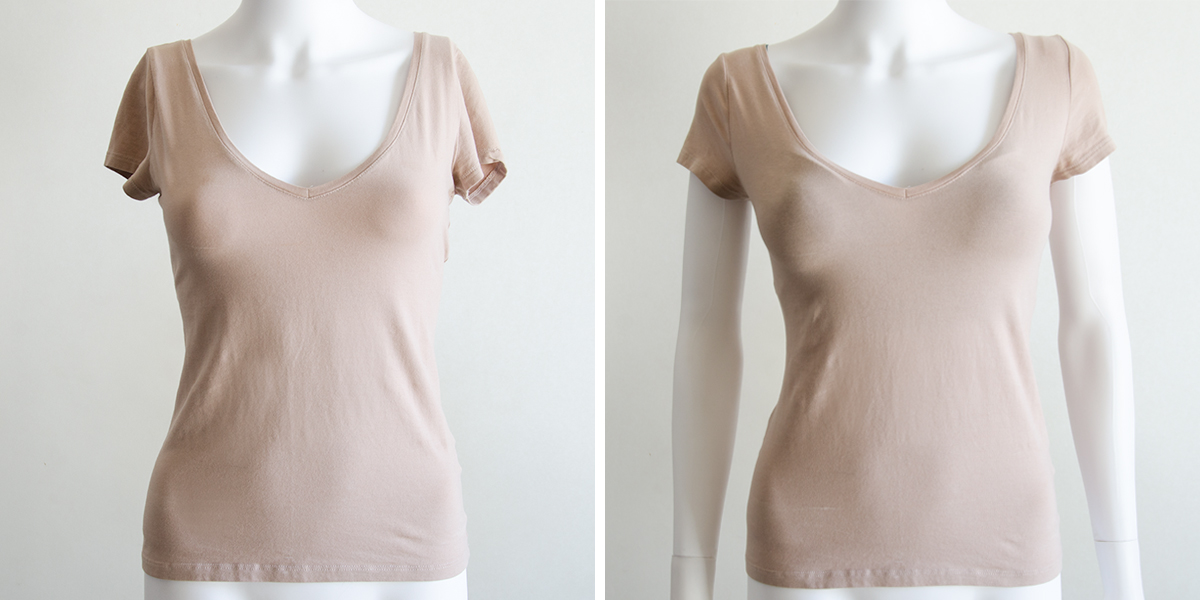
Example of wearable photography using a mannequin (left) versus a model (correct). Production images via Mr Porter
Flat lay photography
Flat lay photography is the easiest and one of the about cost-effective means to photograph your habiliment items.
Flat lay photography works well for shirts and I have also seen it work for socks and mens' trousers.
I commonly wouldn't recommend using a apartment lay for your ecommerce store, unless you need a absurd visual to share on social media . I think when it comes to production images, displaying them in a more realistic form is of much more than value to your customers.
To take a great flatlay, you'll demand a big piece of white paper or a white sheet to lay on the ground.
Make sure your products are looking their best — iron your clothes and make sure collars are in place and buttons are done upwardly. Yous tin requite your products an extremely polish and flat shape with a piece of paper-thin.
Think that your customers tin't try on your products, and are often hesitant to purchase products because they can't imagine how the products look on themselves.
The reason I want to mention flat lay photography is that 'knolling' is all the rage on social media, and overlooking social media platforms equally a source of ecommerce traffic isn't wise.
If you lot need convincing, check out Shopify's infographic on social commerce .
If you lot haven't heard of knolling earlier, it'south the procedure of arranging objects in a grid .
Social media users, primarily Instagrammers and Pinterest users with a fashion/lifestyle focus, create these arrangements of products to fit a certain theme and look amazing at the same fourth dimension. Create your own amazing flatlay compositions and watch as the regrams, repins and likes flood in.
You should utilize at least ane of your products and choose accessories or household items that complement the production. Not all of the products need to exist your ain; the idea is to drive traffic to your ecommerce store indirectly by first driving traffic to your social media platform.
It is important to consider the ways in which your products are related to one another. Photos should clearly communicate a common theme, occasion or color as to not overwhelm the viewer.
Step 2 – Ready your habiliment photography equipment
The equipment you need doesn't demand to break the bank or be expensive. Digital cameras are coming downward in price and smartphone cameras are getting better and ameliorate.
Here'southward a listing of photography equipment you volition demand:
Camera
Having the correct camera tin brand the difference between a professional looking photo or an amateur one. Mirrorless is by far the best type of photographic camera to photograph clothing due to their newer engineering science, studio lighting connectivity, and physical lighter weight when compared to traditional DSLR cameras, only don't be fooled into buying i if you don't demand to. Your smartphone can work simply likewise.
Lighting Equipment
For clothing photography, lighting is essential. Potential buyers want to see all the details of the particular so it is disquisitional to obtain lights which will talk with your camera. To brainstorm with, I would recommend selecting a low-cal kit which contains 3 lights and then a 3-signal lighting setup can be implemented (i fundamental light, i make full lite, and a dorsum or hair light).
If you decide to apply a smartphone for your photography then investing in a continuous light kit is the way to go as there is no need to sync the light to the camera'due south shutter. You can too use this type of lighting kit with a mirrorless camera, but better results are achieved with a traditional studio lighting setup and a wireless trigger.
Studio Backdrop Kit
Forth with lighting, the properties is 1 of the nearly crucial pieces of equipment required for clean looking images. I'd recommend searching for a plainly white photography properties which includes a stand. The kit should exist approximately ten ten twenty foot as this will allow yous to photograph a mannequin at total length for whatever longer dresses or garments you may sell.
Studio (Wireless) Lighting Trigger
When discussing mirrorless cameras earlier, I mentioned you would need a studio lighting trigger. This tertiary party accessory will communicate between the camera and studio lighting kit to ensure they 'go off' or 'fire' at the same time the photo is taken. When y'all purchase one of these just make certain the brand you are buying is compatible with the camera brand y'all plan on using.
Tripod
Selecting a sturdy tripod is a must for studio photography equally it eliminates any unwanted camera milk shake caused by hand property your camera. Aim to get a tripod that extends to roughly your eye level in height and seek one that has a spirit level as this volition come in handy when setting the legs upward.
Mannequin or Model
Mannequins can provide added benefits to the overall style and keep your budget low.
Every bit I mentioned before, make sure to go a mannequin without amputated arms or legs.
While using a model can exist expensive, the added benefits a professional tin bring to a shoot sometimes outweigh the toll.
For instance, a professional model will exist able to change their body to compliment the clothing they are modeling, whereas if it were on a mannequin, you would have to pivot the garment for the aforementioned event.
A model can also bring natural motion to the wearable which the buyer can relate to. Besides having your model pose in an outdoor location might adjust your brand amend than an indoor studio environment.
Lifestyle apparel images are growing in popularity, so it only depends on the overall await and feel you are going for.
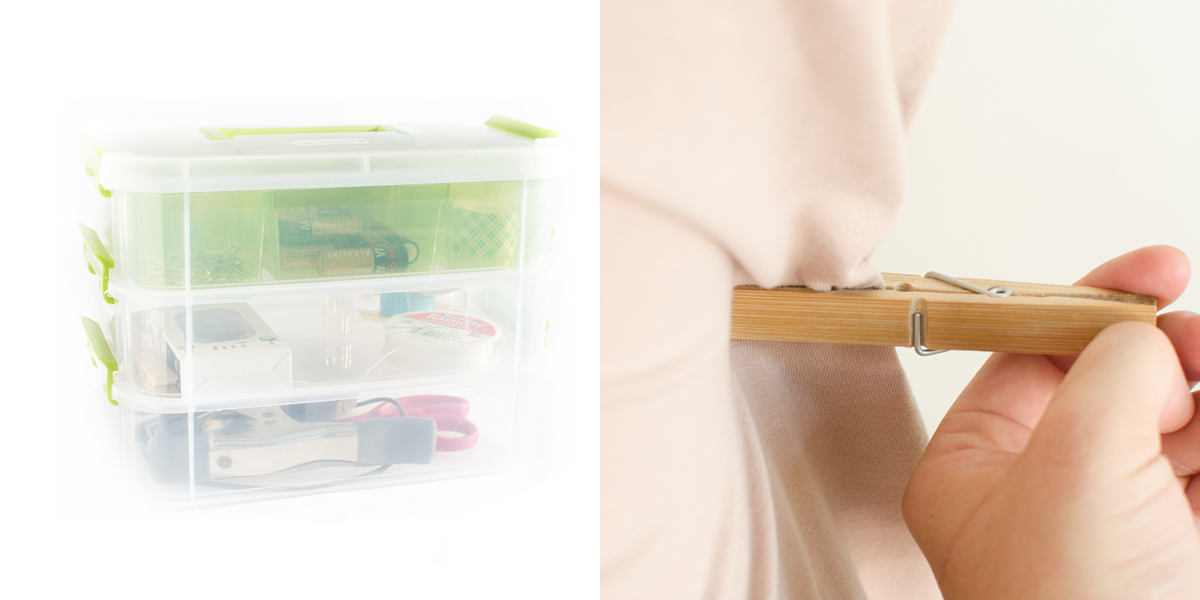
Photography toolbox
Having a bag of tricks for your photo shoot is always very handy when preparing your garment for clothing photography. For instance, using pins to pin back specific folds or labels will save you copious amounts of fourth dimension in Photoshop later. Clothes pegs are likewise a great way to gather and secure excess fabric at the dorsum of the model or mannequin to reflect a perfect wrinkle-free, seamless fit.
Other items of value include, record to position material just where you demand it, spare batteries for your camera, spare bulbs for your studio lights and a steam iron to rid any wrinkles.
Step three – Set up your habiliment products
Preparation is key to a bang-up photo shoot. I tin can't tell you how many times I've washed photo shoots only to find a pocket-sized, nonetheless obvious detail, out of identify. The time you put in here will save you lot much editing time after and even save you time from redoing an entire shoot! I'd advise you to gather all the articles of clothing you lot wish to photograph and beginning a production line to get everything gear up.
Ironing or steaming all your garments (to your favorite song playlist) is the first thing you should do. Do this before hanging everything to ensure no wrinkles are showing.
Second, have your photography toolbox open, spare batteries charged and pins at the ready. If you're going for mannequins, dress your mannequin with the first item of habiliment.
Look out for those tiny details on your garments.
- Cheque if all the buttons deemed for and buttoned up
- If your article has tassels or ties make sure they're styled neatly and consistently.
- Brand certain your sleeves are not merely folded neatly but folded consistently
- Make sure in that location are no stains on the habiliment
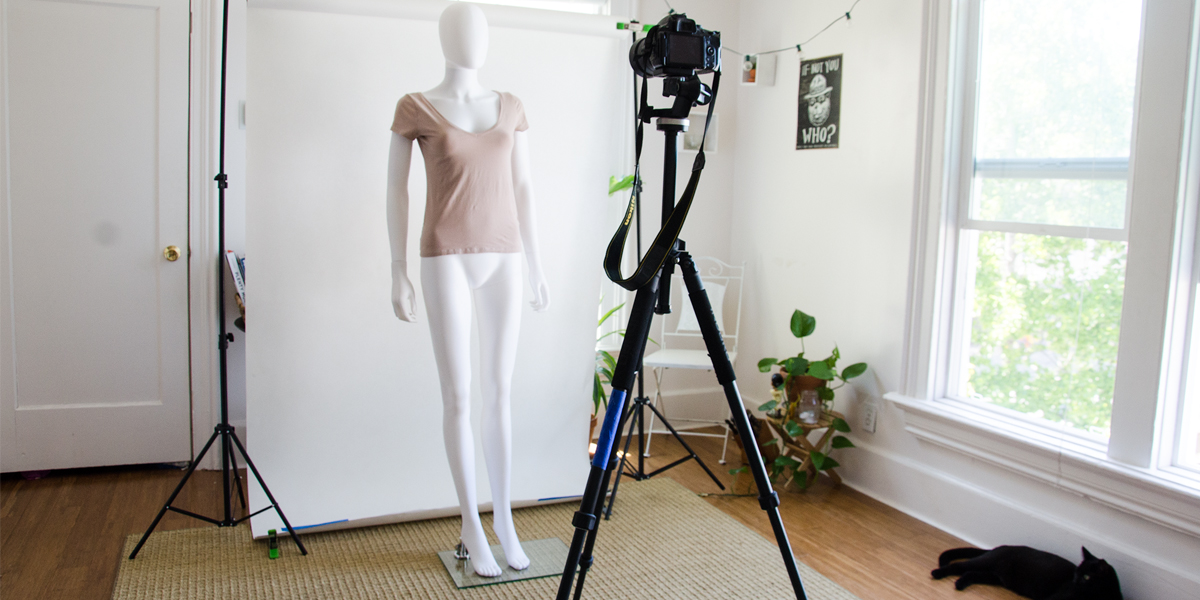
Pace 4 – Ready upwards your photography studio
Your wear photography studio could be a professional person i, or maybe just a spare area in at the dorsum of your shop. Information technology doesn't actually matter as long as you accept the right photographic camera and lighting.
Fix your properties outset. In one case that's done, outset setting up your lighting and camera. As I mentioned previously a three-point lighting setup is best for article of clothing photography.

Three-point lighting set up via PhotographyPLA.NET
To start with, fix up one low-cal next to your camera and direction it toward the mannequin, this will form the key light.
The second light will human action as a fill calorie-free and should exist positioned at a 45-degree angle from your mannequin and farther away from the beginning cardinal lite.
Finally with the remaining light position this between the mannequin and the backdrop.
The image higher up is a practiced guide to how best to position your camera, tripod, and lights in comparison to the position of your model or mannequin.
Pace 5 – Check your camera settings
When setting your camera, there are three factors you need to look into – aperture, ISO sensitivity, and shutter speed.
Discontinuity
For wear photography, it's platonic to shoot at a loftier f/stop, between f/eight and f/11. This will assistance you become a more focused shot on your apparel products.
Shutter speed
Shutter speed refers to how long your shutter volition remain open. Ideally, you should set it effectually ane/125 when photographing article of clothing.
ISO sensitivity
When taking photos of clothing, the platonic ISO settings is between 400 and 800. This will depend on what blazon of lite sources you're using. If you're using artificial lighting, prepare your ISO betwixt 600 and 800 instead, allowing you to reduce the noise.
Pace half dozen – Start taking your production photos
Now, onto the interesting part – photographing your products!
Make sure that your photographic camera is stable. Use a tripod. This will give you crisper and sharper product images. If you don't have a tripod, y'all can place your camera on whatsoever stable or hard surface.
Your mannequin or model should be at the center of your camera frame. Brand information technology a signal that it takes up the majority of your canvas. If you need closer shots, either adjust your tripod or adjust the optical zoom of your camera.
Tip #ane: Do Non use a digital zoom – It lowers the quality of your production photos due to the cropping of the paradigm while shooting.
Tip #2: Set your camera on a 2-2nd-timer mode. Doing this allows your photographic camera to re-focus on your subject after pressing the shutter.
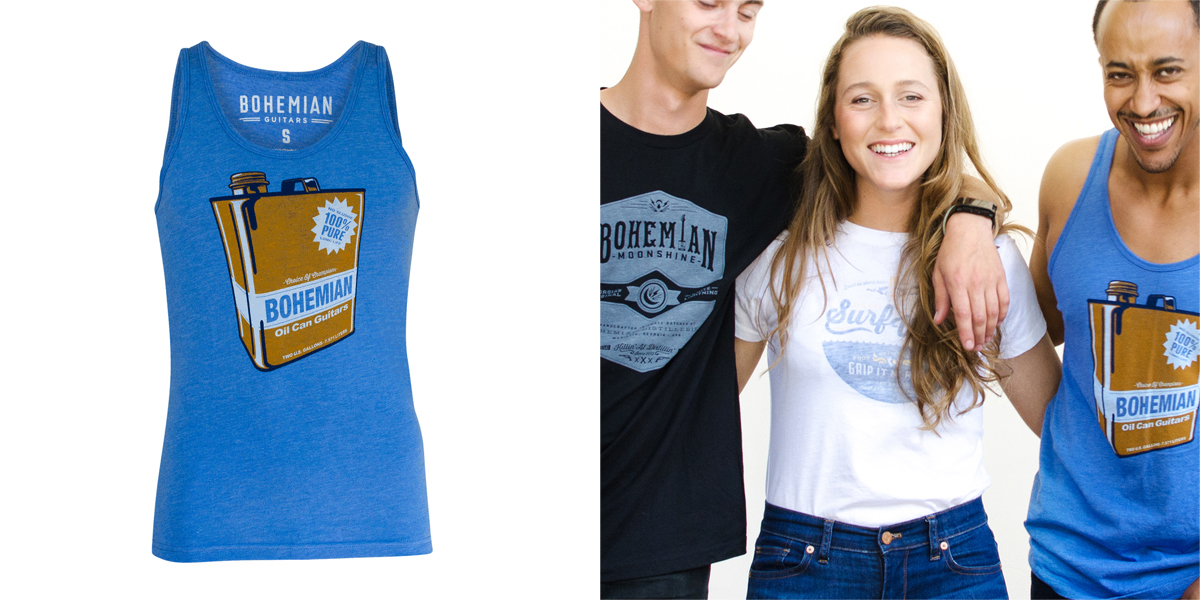
StyleRunner uses models for their clothing photography to how our the particular is worn and styled.
Bear witness off the details
Don't overlook the small details when you lot photograph clothing.
There is nada worse for a client when they receive the product and realise that the fabric is strong when they idea information technology was soft. Or that the item had a zip closer when it really has buttons.
So take photos of the stitching, textile, tags, zips, buttons and anything else about your clothing item that you remember the customer may want to see before making a purchase.
Past including details you can reduce the number of customer service questions you may receive and also increase conversion rates because the customer has all the information about the particular in front end of them.
Y'all can always enable a zoom function that allows your customer to practise the zooming. You should provide a few choice shut-ups to show the customer where they should await.
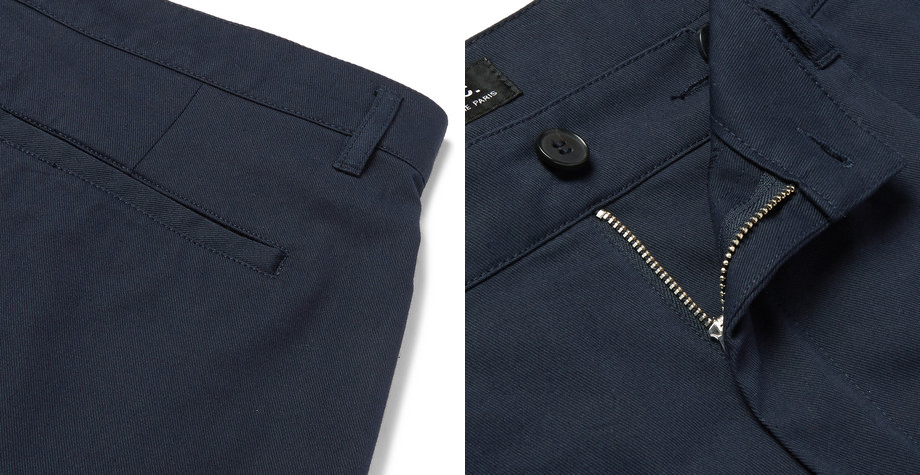
Examples of clothing photography that includes details of the item via Mr Porter .
Tips when photographing habiliment
To get the item to sit correctly, I suggest using props and tools to aid yous when you photograph clothing.
- Iron the article of clothing item to remove any wrinkles. I find that a steamer is the best choice.
- If you need to fill out the bust of a garment, put a padded bra on the mannequin
- Utilize pins and pegs to clip garments into place if the item is as well big for the mannequin or model
- Using a fan tin can be a great way to give your production motion
- Use transparent tape to continue whatever tags or labels out of the fashion
Footstep seven – Editing your product photos to increment sales
Once yous're done taking photos of your products, it's time to edit your images to brand them all looking consistent for your online store.
Your post production process should take into consideration how you want your photos to look on your ecommerce shop. Brand sure that you lot handle the alignment, white background, cropping, and color correction to ensure consistency.
If you want to accept your clothing photography to the adjacent level, recall most creating ghost mannequins — you can't get whatever more professional person than that.
A ghost mannequin effect makes your product images await like it takes the form of a human without displaying a model. By showing small sections of the within of the garment, you give the production a more 3-dimensional form.
Example of ghost mannequin product images via Matches Style .
You don't need to hire a model for ghost images; a mannequin will work better. The procedure of taking a ghost mannequin isn't like shooting fish in a barrel, but trust me when I say information technology's definitely worth information technology.
How to create a ghost mannequin outcome
Have a photograph of the product from the forepart. Then take a photo from the back, but turn the product inside out.
Find that the photo on the right is of the garment inside out. This is used to create the 'neckline' of the item.
You should use a tripod for this and avert changing the amount you zoom. A good idea is to too mark a spot on the floor for your mannequin so it's in the same spot for both photos. This will make it easier to 'stitch' the items together afterwards.
The next step is removing the background, as you need to be able to encounter the back through the front end. Then you just take to identify the front on top of the back in Photoshop, which shouldn't be as well difficult if both your photos were taken from the same altitude and angle.
Read our pace by stride post on how to create a ghost mannequin consequence in Photoshop with screenshots to show you exactly how it is done.
The Outnet uses ghost mannequin product images to show the form of the garment.
I exercise empathise that this requires a certain level of skill and a fleck of extra time, so if you ever need help doing this Pixc can remove the photograph backgrounds and create the concluding ghost images for you lot.
Terminal step – Upload your product photos to sell online
The concluding matter you lot need to do is upload your items to your online store and whatever market that you are selling on, making sure that y'all match the image requirements.
Think that clothing photography can be fun — and when done right, can brand your shop look amazing! If you have any of your ain tips, allow us know in the comments below.

How To Set Up Lighting For Clothing Photography,
Source: https://pixc.com/blog/how-to-photograph-clothing-for-your-ecommerce-store/
Posted by: reddywassing.blogspot.com
0 Response to "How To Set Up Lighting For Clothing Photography"
Post a Comment